.

Enable desable WiFi in Windows 8

ou take your new Windows 8 PC to a coffee shop. You’ve just set up wireless Internet at home. Or you’re one of the lucky ones who has Wi-Fi on a plane. So how do you connect to and manage your laptop’s Wi-Fi connections from Windows 8?

In the past, you’d click on the connection icon in the lower-right corner (this group of icons is called the Notification Area). Then, you’d choose a wireless network and connect from there.
Luckily, you can still do that in Windows 8. Just press Windows + D to go to the Windows 8 desktop, and you should see the familiar connection icon in the lower right. Click on it, and you’ll see a brand-new pane slide into view from the right side.

Enable WiFi Connections
This is the connection pane.
But what if you’d like to manage wireless connections from the Start Screen? Here’s how to do that.
  1. Press the Windows Key to go to the Start Screen
  2. Move the mouse to the bottom-right corner to see a few icons start to appear. Then move the mouse upward. These set of icons are called the Charm Bar
  3. Click Settings
  4. Click the Network icon. You’ll see the same pane as above slide into view

Enable WiFi Connections
Click the Network icon.
At the top is Airplane Mode. Those with a smartphone or tablet will be familiar with this setting. It disables all Wi-Fi connections and saves a lot of battery life … useful when your laptop is aboard a plane that doesn’t have Wi-Fi, or for landing and take-off. Also, you don’t have to use Airplane Mode when on a plane. There are lots of times where you’ll want to turn Wi-Fi off … such as when you’re connected to the Internet via cable.
Next up is your Connections. Here you’ll see an icon with a cable next to it if you’re connected to a hardline, or a series of bars if you’re connected to Wi-Fi. The shaded bars show your connection strength, with five being the highest.
Below that are the Wi-Fi connections available in your area. Find the one appropriate to you and click on it.
If you can select the Connect Automatically check box, your PC will connect to that source every time it’s in range. Then, click Connect. You may need to enter a password, depending on the connection.

Enable WiFi Connections
You can choose to connect automatically.
You can also disconnect from Wi-Fi or connect to a different location from this same screen.

Customizing the Windows 10 Start Menu

Customizing the Windows 10 Start Menu


Start menu in Windows 10, or you may hate it. But it actually doesn’t matter how you feel about it; you can expand it, shrink it, customize it, or get rid of it altogether.
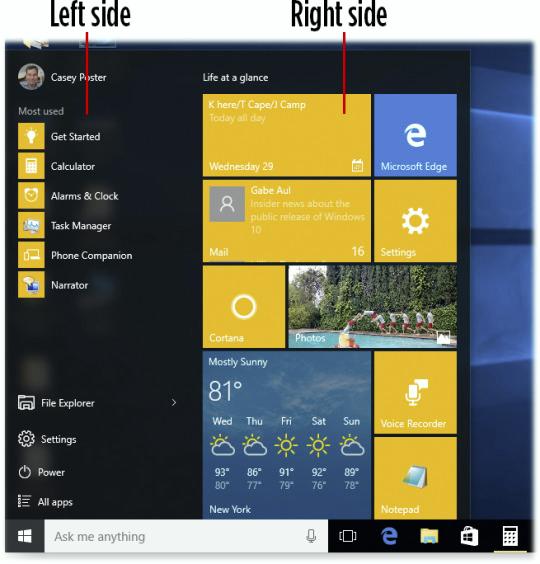
Here’s the complete list of things you can do to the right side of the Start menu — and the left side.
Customizing the Windows 10 Start Menu

Right Side

Expand it: Drag the top or right edge, using the mouse or trackpad. It snaps bigger or smaller. (It doesn’t work with a finger on a touchscreen.)
Make it fill the entire screen: Right-click anywhere on the desktop. From the shortcut menu, choose Personalize. On the Settings screen, click Start, then turn on “Use Start full screen.”
In this mode, the left column of the Start menu is hidden. The live tiles area fills your entire desktop (which is handy for touchscreens).
Move a tile: With the Start menu open, drag a tile to a new spot.
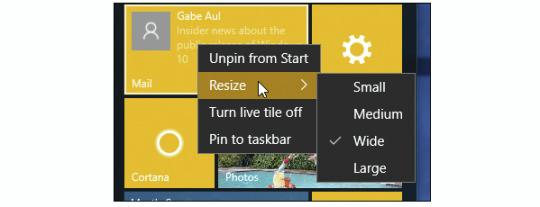
Resize a tile: Right-click the tile. From the shortcut menu, choose Resize. You always have a choice of Small and Medium; some apps offer Wide or Large options, too.
image
Add new tiles: Right-click any folder, disk, or app. From the shortcut menu, choose “Pin to Start.”
(Or open the “All apps” list, and right-click an app’s name there.)
Its tile now appears at the bottom of the right side of your Start menu.
Make a tile stop blinking: If you’d rather silence the animation of a “live tile,” right-click it. From the shortcut menu, choose “Turn live tile off.”
Remove a tile: Open the Start menu. Right-click the tile you want to eliminate. From the shortcut menu, choose “Unpin from Start.” (You’re not actually discarding that item — you’re just getting its tile off the Start menu.)

Eliminate all tiles: Right-click each tile; choose “Unpin from Start.” Repeat until you’ve eliminated all the tiles. Now only the left-hand column remains, just as it was in Windows 7.
Change the color: Right-click anywhere on the desktop. From the shortcut menu, choose Personalize. In Settings, click Colors. You can change both the tile colors (“Accent color”) and the background of the Start menu and taskbar (“Show color on Start, taskbar, and action center”).

Left Side

Add new items: You can’t.
Remove items: You can remove listings in the “Most used” section — handy if you’re embarrassed about something that shows up there. To do that, right-click its name. From the shortcut menu, choose “Remove from this list.”

7 awesome paid iPhone apps on sale for free right now

8 awesome paid iPhone apps on sale for free right now
iphone-6

Happy Thursday! Today we’ve rounded up yet another set of eight paid iPhone apps that are completely free to download right now for a limited time. Let’s check them out below!
MUST READ: Why do I still use Android?
These are paid iPhone and iPad apps that have been made available for free for a limited time by their developers. There is no way to tell how long they will be free. These sales could end an hour from now or a week from now — obviously, the only thing we can guarantee is that they were free at the time this post was written. If you click on a link and see a price listed next to an app instead of the word “get,” it is no longer free. The sale has ended. If you download the app, you will be charged.

AppBox Pro

app-box-pro
Normally $1.99
AppBox Pro turns your iPhone, iPod Touch or iPad into a manager of personal data.
This powerful, sleek new version of AppBox Pro helps you easily create, browse, organize and edit your private information including new categories such as video and software licenses, events, shopping list, cycle calendar for women and more in minutes with just a few taps. AppBox Pro has been designed exclusively for the iPhone, iPod Touch and iPad.
AppBox Pro 3.0 is updated with a stunning new design and improved performance. It is easier to use, faster and more efficient than ever!
Start with one of 20 well-designed apps for your expenses, loans, anniversaries, travel and more.
Choose from over 350 powerful functions. Just tap to add budgets, events or confidential information. Touch and drag your finger to reorder. And with recent optimizations, AppBox Pro is quicker and smoother than ever before.
Turn on iCloud so your personal data is kept up-to-date across platforms and automatically available on all your devices.
Get started
– Use the slide navigator to quickly select an app
– Customize your app using Theme colors
– Turn Passcode on to secure your valuable data
– Use Favorites to quickly navigate your commonly used apps
– Quickly and easily share your data via AirDrop, Mail, Messages, Twitter or Facebook
Intelligently create
– 19 fully customizable, built-in categories and templates to securely store bank information, credit cards, membership numbers, accounts, photos, video and more in Wallet
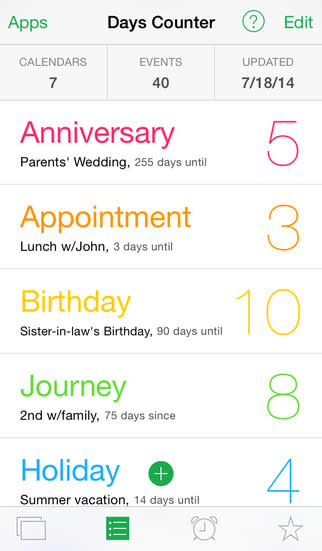
– 6 Customizable built-in calendars; count days from event dates and use slideshow in Days Counter
– Easily manage your budget and checklist in Expenses List
– Track periods for multiple women’s accounts; check the average and trends from charts in Ladies Calendar
Innovative conversion tools
– 167 currencies in Currency Converter
– Solar/Lunar Calendar Converter ~1901 to 2042
– Work with 53 languages and listen to 42 languages in Translator
– 17 categories & 358 units in Unit Converter
Discover
– Explore 98 countries’ holidays
– Enjoy the amazing background photos of different locations around the world
Advanced calculate
– Basic/Scientific Calculator
– Date Calculator
– Loan Calculator
– Percent Calculator
– Sales Price/Tax Calculator
– Tip Calculator
– Compare Unit Price
Powerful utilities
– Battery Status and Device Information
– Gorgeous new Clock including waves, flip and digital theme
– Use Magnifier with brightness, flashlight, invert or zoom and snap a picture of any object
– Use Mirror with flip horizontal, photo effects or zoom and snap a picture of your face
– LED Flashlight
– Random number generator
Download AppBox Pro

Money Tracker

money-tracker
Normally $4.99
Manage your Personal Finance (Income/Expense) Any Time, Any Where with Money Tracker. Download now!!
Take control of your personal finance and make your life simple and financial hassles free.
—————— Best Features ———————
√ Make your own categories of income and expenditure sources
√ Worldwide currency list: Manage all expense in your home currency
√ Interactive graphical charts of your expense and income for perfect forecasting
√ Easy & more realistic Bank accounts Setup with Account number & Branch Name
√ View and email Bank statement in PDF and HTML Format
√ Upcoming expense lets you know about where you would spend in future
√ Upcoming income tells the source of your future income
√ Add income/expense category by your preference
√ Built-in Catchy logos to use while making income/expense category
√ Professional Design with easy to use interface
—————————————————–
The aim of this app is to make it easy to manage and keep track of your income and expense and allows you to make a proper budget. So what are you waiting for, Download Money Tracker and enjoy financial peace in your life
Download Money Tracker

CameXtra+HDR

camera-xtra-hdr
Normally $1.99
** For newest pictures and video for this app please use App Store app ***
• Third party app discovery apps have old pictures.
√ HDR photography for most difficult lightings.
• You can adjust the input pictures, such as fusion.
• You can save input pictures taken for HDR separately and load them later. When you open the photo library screen, tap on the title.
√ Manual controls over exposure, focus, white balance and colour tint, and many more.
√ Video recording with ability to pause.
• You can also merge your videos from the photo library.
When you open the photo library screen, tap on the title.
√ High resolution picture quality for preview, when in edit mode.
• You can see true pixel quality of a photo when you zoom, in edit mode.
√ It has an easy to use reality slider control which is not limited to the device width, let’s you easily select different values with a wider distance.
Othe Camera features :
• Wide distance slider control.
√ Timer with consequent number of shots and warning flash.
√ Camera burst mode captures up to 30 frames per second in 1920 x 1080 pixel.
• You can make collage photos out of your videos.
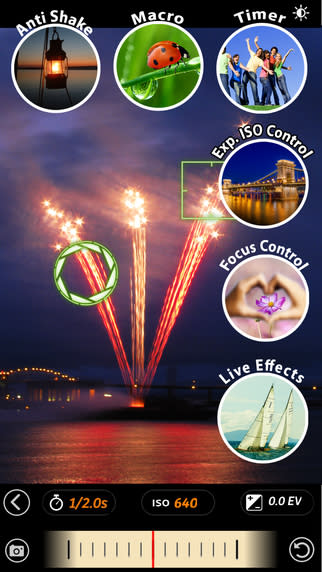
√ Stabilizer ( anti shake ).
√ All effects and editing functions are available in camera preview mode ( live ).
√ Flash modes and flash light.
√ Photography golden lines guides and level line.
√ Low battery consumption.
√ Zoom in camera view and when editing photos.
Other Editing features :
√ You can enhance quality of your videos and apply colour effects.
• Photo editing functions and colour effects are available from your device Photo app and Camera app.
√ Professionally designed artistic color effects.
√ Powerful shadows and brightness filters, which brightens dark areas.
√ On tap pictures enhancement based on many scene modes.
√ Enhance in details using shadows, brightness, contrast, hue, saturation, sharpness and vignette.
√ Depth of field and tilt shift. Plus black & white mode instead of blur.
√ Mono color effects and posterize.
√ Adding GPS information to pictures and view picture detail data.
√ Crop and rotate picture.
√ Quick and fast one place shoot and edit.
√ Very low battery consumption when editing pictures.
Sharing :
√ Instagram, Twitter, Facebook*, Flickr*, Email and many more.
* Facebook and Flickr sharing requires their relative apps be installed on your device.
Download CameXtra+HDR

LiquiPad

liquipad
Normally $0.99
LiquiPad is an addictive visual toy that turns the surface of your iPhone into several different virtual liquids that respond to and interact with your touches. As relaxing as it is entertaining, LiquiPad is also a non-demanding way to keep your mind visually stimulated while listening to music, audiobooks, the in-laws, etc. And, of course, it’s a great way to show off the incredible power of your iPhone. Use any of the 12 built-in themes, or use your own photo library for limitless possibilities.
Using LiquiPad couldn’t be simpler. Tap or slide your finger(s) across the screen to create and manipulate the waves.
Or, tap the gear icon in the lower left to open the settings menu.
LiquiPad must be seen in motion to be believed. There are numerous videos posted online. Search for ‘LiquiPad’ on YouTube.
Tip: If you would like to take a screenshot, you can do so by pressing the home and sleep buttons at the same time. The screen will flash, and the image is saved to your Photo Library.
FEATURES:
– Stunning high-resolution graphics take full advantage of iPhone 4’s Retina™ Display
– Intelligent, speed-sensitive multi touch support
– 12 Beautiful Themes, with infinite themes possible using your own Photo Library or the Camera
– Control over liquid density – make it act like Water, Oil, Syrup, or Gel
– Automatic Wave Generators, such as rain, for use as an animated photo display
– Optional Tilt mode using the iPhone’s accelerometer.
– Realistic Liquid sound effects
Download LiquiPad

Simple Copy Paste

simple-copy-paste
Normally $1.99
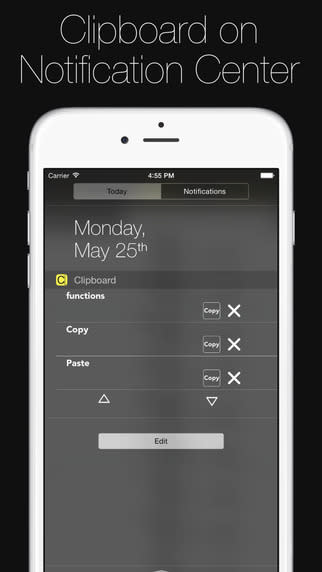
Control your clipboard.
Copy and Paste easily.
Keep your clipboard synchronized with all your devices* with iCloud.
Just add the Clipboard widget to your Notification Center, copy a word or a text and look at the widget**.
The text or word will be available in Simple Copy Paste in all your devices*.
Simple Copy Paste does not contain Ads.
And also:
– Search bar;
– Reorder in alphabetical order or by date.
– No in-app purchases.
If you need more functions, you can buy Copy Paste Pro, that also has:
– Capitalize, uppercase, lowercase and other 3 functions directly from the widget;
– Rearrange buttons;
– Blacklist: Put on the Blacklist words or beginning of words(like 3 letters) that you don’t want to save.
*Devices with iOS 8 or superior using the same iCloud account and with iCloud Drive enabled.
**The text or word copied will only be available in the app if you open your Notification Center with the Clipboard widget enabled or open the main app after copy something.
****Be Careful with your sensitive data. The widgets are also available when the screen is locked.
Download Simple Copy Paste

StepIt

stepit
Normally $0.99
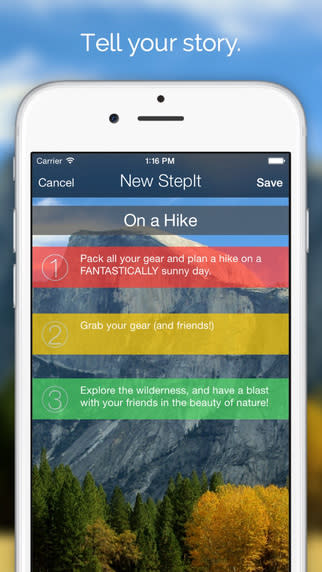
Tell your story with StepIt. Create directions, give advice, or tell a joke. Be cute, be informative, or be funny. Pick a background, upload your own image, or change colors. Once your finished, sharing your amazing StepIt with the world is only a tap away. Thousands have enjoyed creating beautiful StepIts; start creating yours today.
What you get with StepIt:
-Beautiful imagery: Add your personal touch using photos from your own library, or choose from a hand-picked selection from Pixabay.
-Change Colors: Change the colors that highlight your StepIt, and make your creation standout.
-Sharing Galore: Once your StepIt is finished, effortlessly share through countless sources.
Download StepIt

GrooveMaker 2

groovemaker-2
Normally $9.99
GrooveMaker® 2 is the latest version of the revolutionary iPhone/iPad/iPod touch app designed for creating non-stop electronic, dance and hip-hop tracks in real-time. Now anyone can get results that sound like they were made by a professional DJ every time!
GrooveMaker 2 works with pre-arranged sets of loops (called “Songs”) that always sound good together. You can remix them in limitless ways with our patented “groove generator” technology.
In addition to its touchscreen interface, GrooveMaker 2 now supports a number of powerful new control options. The latest version introduces full support for iRig® Pads, IK’s powerful new ultra-portable pad controller. Plug your iRig Pads into your iOS device of choice and you’ll be able to take advantage of its custom GrooveMaker 2-specific modes — Groove Mode and Launch Mode — that let you control groove length, browse through loops, tweak effects, trigger Randomixes and a whole lot more. Alternatively, you can also enjoy touchless control with your iRing™ motion controller.
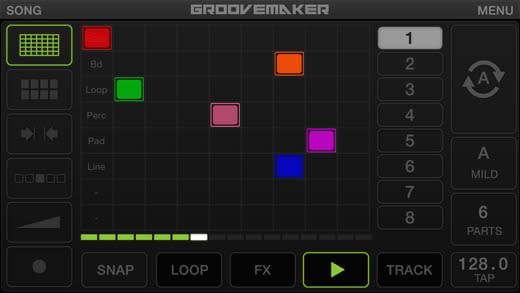
Select a Song and you’ll enter the Grid interface. Push the Randomix button, and you will see the building blocks of your groove appear and the music will start playing. You can change grooves with the Randomix function or literally “draw” new grooves directly on the grid. You can lock loops, solo and mute, change volume, pan and freely associate loops with each of the 8 available tracks.
Enhance your grooves with the Effects interface. You get 16 high quality effects: Filter, Delay, Flanger and more. You also get highly creative effects like Twist, Brake and Spin that can only be found on sophisticated professional DJ gear. You also have a Master section where you can add a finishing touch to your groove with a Compressor, an EQ and a Filter.
GrooveMaker Packs offer over 6,500 loops. They come grouped as “Song” packs that are each organized by categories such as bass drum, loop, bassline, pads and percussion. There are 100 collections available that feature styles like House, Dubstep, Hip-Hop, Techno, Trance, Electro, D’n’B, Reggae, Reggaeton and Rock. There are even artist packs from Ace of Skunk Anansie, Chris Domingo and Cool & Dre.
GrooveMaker 2 features:
• Intuitive interface
• 23 Packs available in 100 song collections including styles like EDM, Dubstep, House, Hip Hop, Techno, Trance, Electro, D’n’B, Reggae, Reggaeton and Rock plus artist packs (4 built-in Songs plus 23 packs available for in-app purchase)
• iRig® Pads support: select tracks, cue loops, control effects, change length, tweak effects, trigger Randomix and more with the fully customized native support of two GrooveMaker-specific MIDI maps
• iRing™ support: control effects, parts and Randomixes with the iRing motion controllers
• Matrix interface for simplified loop remixing by drawing
• Flexible management of the Randomix algorithm
• Single loop duration can be freely set
• Groove duration can be freely set from 1/2 bar to 8 bars with new 1/4 to 1/32 live loop functions on saved grooves
• 16 FX with automation and touch pad-like interface (10 Filter FX built-in plus 6 more available for in-app purchase)
• IMPORT functions allow you to easily import or record in your own audio files for use
• High quality time stretch for seamless tempo variation from 50% to 200% of the original BPM
• Real time recorder
• Master control with Compressor, EQ and Filter
• Share via Audio Copy, E-mail, Wi-Fi, FTP or SoundCloud
• Compatible with Audiobus, Inter-App Audio and X-Sync
Download GrooveMaker 2

Respond to calls with text messages in iOS

Pro tip: Respond to calls with text messages in iOS
Have you ever been in the middle of a call, only to be interrupted by another call coming in? It can be annoying, especially as the other caller hears the "buzz" of the iPhone silent ringer. Sure, you could enable Do Not Disturb mode before making your first call, but why not do something a little more reactive instead? Let's take a look at how to set this up so that you can easily send a message with one tap to a caller to let them know if you're busy or on another call.

Setting up call messages

By default, iOS 8 comes with a few reply messages pre-populated into the software. However, if you want to customize the messages that are available to you, simply follow these steps:
  1. Open Settings | Phone | Respond with Text
  2. Type in your messages into the Respond With fields (Figure A)
Figure A
Figure A
Type in a message that will be displayed to incoming calls.
Note: You can type up to three different messages in this area. You'll be able to choose between these three messages with only a single tap when you receive a phone call.
The default messages are: "Sorry, I can't talk right now," "I'm on my way," and "Can I call you later?" However, you can make these messages say anything you want.

Replying with messages to callers

Whenever you receive a call, there are two buttons above the "Slide to answer" control (Figure B). One of those buttons is Remind Me (which we'll talk about in a minute), and the other button is Message.
Figure B
Figure B
There are two buttons above the "Slide to answer" control.
When you tap Message, you'll have access to the all of the messages that you typed into the Settings. However, if you didn't specify any custom messages, you can use the default ones that are included in iOS 8. If you still need to type something even more customized, you can tap the Custom button and send a full iMessage to the caller (Figure C).
Figure C
Figure C
You can tap the Custom button and send a full iMessage to the caller.
Whenever you tap any of the pre-populated messages, it's automatically sent to the caller without any other steps necessary.

Get reminders to call back

What if you get a call and, instead of sending a text message back to the caller, you want to get a reminder to call the person back after a set period of time? Well, iOS can handle this too.
Simply press the Reminder button (Figure D) when a call comes through, and then select a time. This will add a reminder to the Reminders application so that you'll receive a notification to call the person back after a set time / location.
You can select to have a reminder, "In 1 hour," "When I leave," and "When I get home."
Figure D
Figure D
Easily get a reminder to call someone back using the Reminder button.
What other tips do you recommend for managing incoming phone calls on iOS? Let us know in the discussion thread below.

Make Your Own Video Game

f you’ve played games long enough, you’ve surely thought, “Hey, what if I made a game?” Problem is, you don’t have a fancy computer science degree. You don’t know JavaScript from Fortran, and you wouldn’t recognize an art pipeline if somebody hit you over the head with one.
Making games isn’t easy. It wasn’t easy 35 years ago when Warren Robinett was writing machine code to cram Atari 2600 Adventure into 4 kilobytes of memory, and it isn’t any easier now that 300-person teams are spending millions to create incredibly complex 3D worlds with the latest in bleeding-edge graphics and animation techniques.
But if you can set your sights a bit lower than Halo 5, there are tons of resources out there to help you turn your playful dreams into a reality. These days, game-making software is practically a cottage industry. The first thing to do is find the right tool for the job. Start with these five.
How to Make Your Own Video Game
Boldly going where better game designers have gone before. (Credit: Gordon Cameron)

1. GameMaker: Studio

First released in 1999, this is the granddaddy of modern game-making software, and its popularity is easy to understand. A no-frills interface will make anyone familiar with Photoshop feel right at home, and it combines tremendous depth with a huge community of users. The answers to many GameMaker questions are just a quick search away. Plus, the community forums are full of helpful veterans.
At its core, GameMaker is built for two-dimensional gaming. The toolset lends itself most naturally to classic genres such as platformers and scrolling shoot-em-ups. Go through one of the first tutorials and you’ll quickly author a simple shooter that’ll be familiar to anyone who’s played the classic arcade game 1942.
Some may be turned off by GameMaker’s old-school vibe, but I found it a powerful, surprisingly simple introduction to game design, partly because it forces you to confront fundamentals. What exactly is happening when one object bumps into another? If your character “shoots” a gun, what does that mean in terms of graphical sprites placed along X/Y coordinates? How many frames are in your heroine’s animation, under what conditions does her image flip horizontally, how high does she jump, and how much control do you have over her while she’s in midair? Answering these questions may seem tedious, but it can be exhilarating once you dig into them.
If you do want to write code — or better, yet copy and paste someone else’s — GameMaker accommodates that with its proprietary language, GML, which can be integrated with the mostly drag-and-drop interface.
Price: $99
Sample Game: WizardWizard

2. Construct 2 

Construct feels like GameMaker’s younger, hipper, and pricier cousin. Released in 2011, it does a lot of the same things GameMaker does, but in different ways.
One of Construct’s interface innovations is the “Event Sheet,” a separate tab that aggregates the game logic and instructions running in the background. While there’s nothing here that can’t be executed in GameMaker, the different presentation may be easier for some users to get their minds around.
Which program you prefer will largely come down to personal taste. I gravitated toward GameMaker for the simple reason that it was less picky about which sorts of audio files it was willing to import for sound effects and music, plus the full version is $30 cheaper. But both feature plenty of depth, have a manageable learning curve, and will be especially congenial if your design ambitions skew retro.

How to Clean Out Your Hard Drive in Windows 10

 How to Clean Out Your Hard Drive in Windows 10
Is your Windows 10 hard drive feeling a little crowded lately? You can clean your hard disk and improve speed by getting rid of files and moving data to other devices. Here are easiest ways to free up PC space quickly.

Empty the recycle bin

Image 020
Ah, the beloved old recycle bin. It’s nice to know that some things about Windows haven’t changed in a long time. Windows 10 still uses the recycle bin to hide all the files you want to throw away, and emptying it out can prove effective in freeing up extra space.
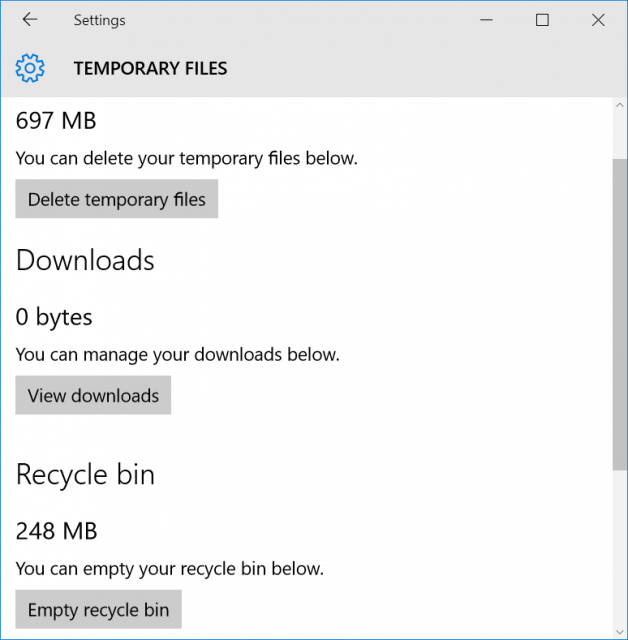
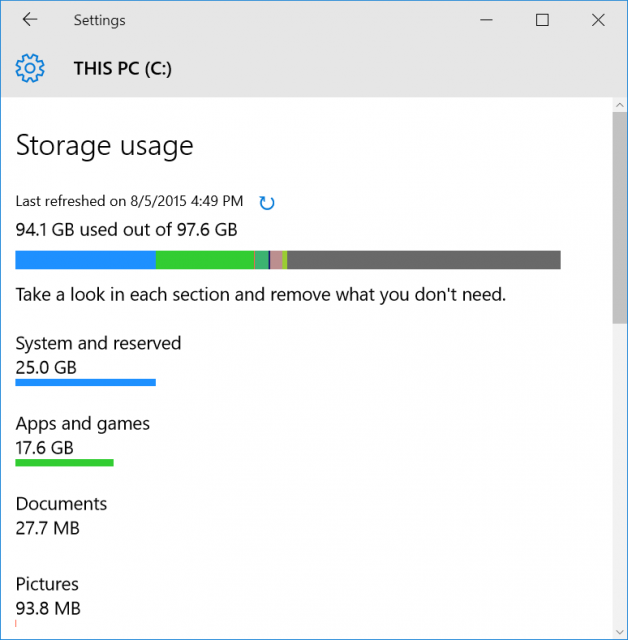
You can right-click on the recycle bin icon for the option to directly empty it. If you can’t find the icon, then head to the Start menu, go to Settings, select System, then go to Storage. You will be able to select local storage under This PC – look for and click Temporary files. This will bring up any locations for temporary files, including Recycle bin. Under Recycle bin, select Empty recycle bin, and confirm your decision. That’s all it takes!
Note: Emptying your recycle bin will only help to clean your Windows 10 hard disk if there’s a lot of stuff in that bin. When you first download Windows 10 – and long afterward, depending on your desktop habits – emptying the recycle bin may not affect your hard drive much at all. If you aren’t sure, take a peek inside your bin and see how full it is first. A few GBs worth of data can still make a difference.

Delete temporary files and downloads

Image 019
Remember how emptying the recycle bin took you through the Temporary files section? If you want to broaden your hard drive cleaning activities, then you can delete all temporary files. What exactly are you getting rid of here? Well, Windows temp files are used to manage document editing, some application processes, various printing tasks, and so on. These files are usually automatically deleted, but sometimes they hang on. Get rid of them all by selecting Delete temporary files in the Temporary files folders.
Another time files are automatically created occurs when you download anything from the Internet. These files pop up in your Downloads and tend to stick around – which means they can quickly stack up if you are downloading a lot of content to your Windows 10 desktop.
You can also find downloads in the Storage section of your desktop (Settings > System > Storage). Select This PC and go back to Temporary files. You can visit Downloads from this section. Select View downloads and delete any files that you no longer need by highlighting them in groups or individually. This is a great way to clear out space manually without accidentally deleting something that you’ll need later.

Uninstall apps

If you were really excited about all the Windows 10 apps and updates, you may have downloaded a few too many during the first honeymoon weeks with the new OS, leading to an eventual slow-down or lack of space for other content, especially on some of the smaller, lighter Windows devices (looking at you, Surface tablets). Some apps can take up a lot of space – the trick is finding which hog the most hard drive room, and which you can live without.
From the Start menu, go to Settings, select System, then select Apps & features. Here you can see all the apps downloaded. Windows 10 allows you to arrange them by various statistics – if you have a long list, arrange them by the amount of hard drive space they are taking up. See which apps are hogging the most data, and delete those that you can live without. Doublecheck that the app doesn’t have anything too valuable on it, then select it and choose Uninstall.

Change how you use OneDrive

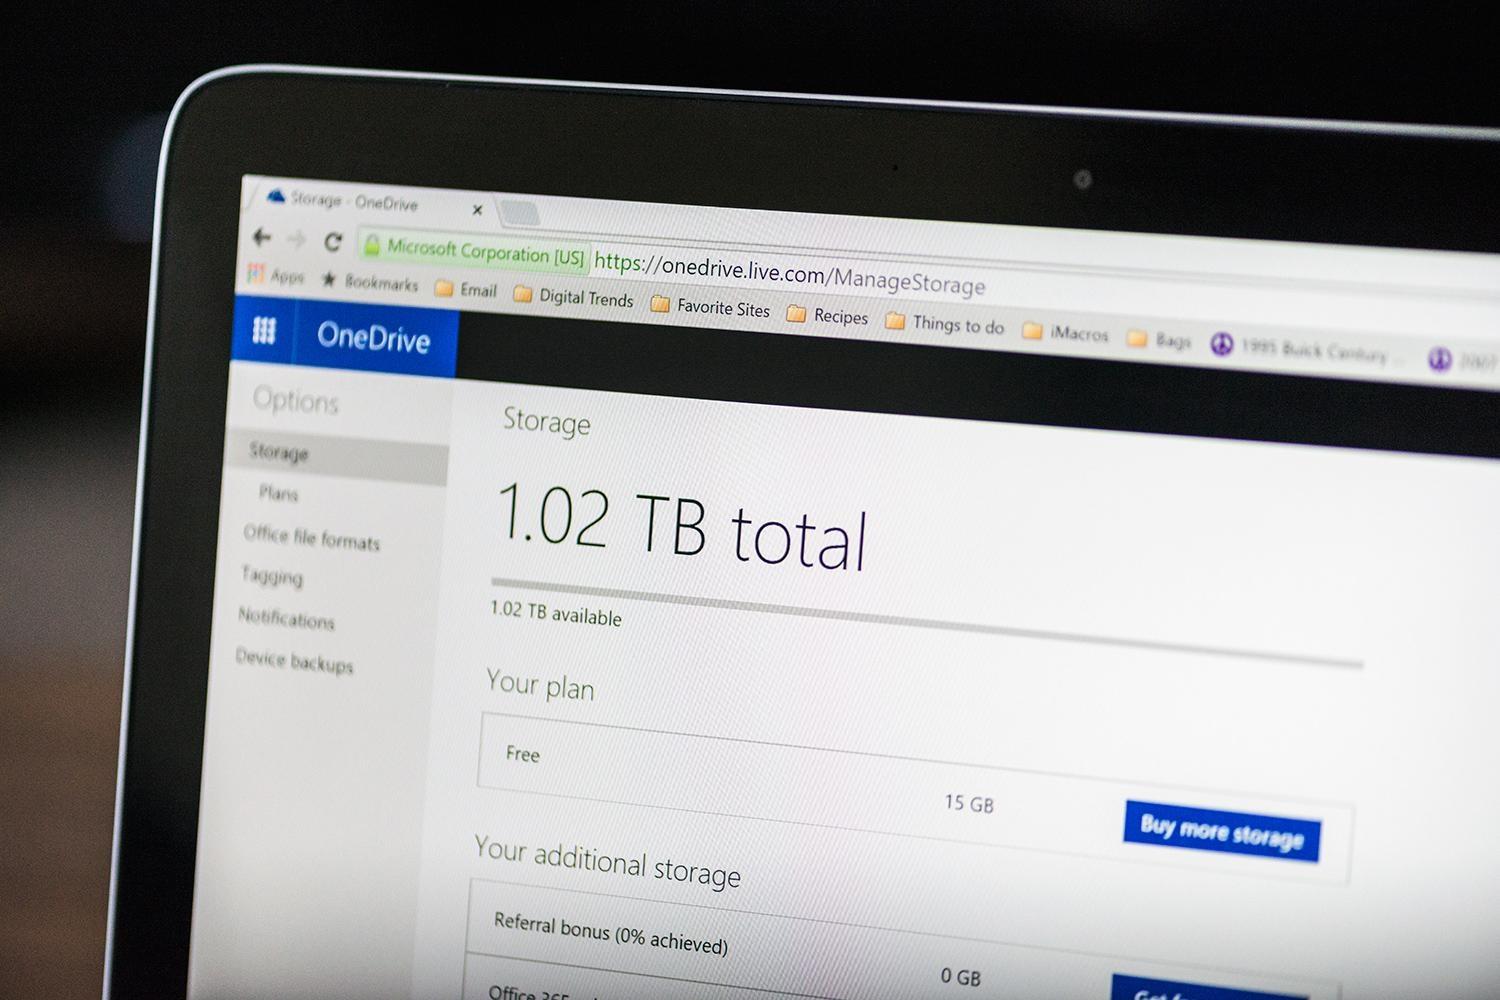
OneDrive is a cloud service for Windows, so you would think that all the cloud data it uses would help free hard drive space, not take it up. This is true, except for one particular OneDrive feature – the ability to save files offline, which you may not even know that you are using.
Sometimes this is handy. If you are dealing with sensitive files or big projects with some sharp deadlines, it’s a good idea to have a backup. But if you are using OneDrive and automatically saving offline for every file and doc at work, school or home, then you probably wasting hard drive space.
Related: This is how OneDrive works in Windows 10
The OneDrive icon should be waiting on the right side of your taskbar (it may be lurking under the Show hidden icons arrow). Click on the cloud icon and choose Settings, then select the Choose folders tab. This will take you to all the files types that OneDrive is saving offline, and how much space each are taking up. Unselect all the OneDrive folders that you don’t absolutely need. Remember, you can still access all these files online at OneDrive.com, so you aren’t really losing anything.

Use your Xbox One

Microsoft platforms are growing increasingly interconnected, and the convergence is very apparent in Windows 10, which connects more freely to other Microsoft devices like the Xbox One game console. If you have an Xbox One, you can use it to help save some space by swapping out select apps and data.
Related: Xbox One to receive Windows 10 upgrade in late 2015
An Xbox One can hold 500GB of content, including a variety of network and music apps. You can stream content from the Xbox to your Windows 10 PC with just a few steps. This allows you store data on the game console and free up space on your PC, if you have content you only use while at home. Just remember to delete the data from your PC after you transfer it to the Xbox.

Use an external drive

From USB drives to full external hard drives, one of the simplest ways to clean up your hard drive on Windows 10 is moving extra data outside of your computer.
First, hook up a hard drive and make sure that it is properly formatted and ready for uploads. Dragging and dropping a file into the new drive will create a copy of the file, allowing you to erase the original.
However, you can also move large chunks of files at one time. Open your File Explorer on the taskbar and select all the files you want to move outside your PC hard drive. Once they are selected, go to the Home menu, select Move to, then select Choose Location. Pick your external drive from the list, and it will drop all files at that destinations – you don’t even have to erase anything afterward.

How To Automatically Login In Windows 10

you can configure Windows 10 so that you are logged into your account automatically. This is great if you are the only person using your computer as it shaves valuable seconds off the startup process. If you're sick of typing your password, here's how to bypass Windows 10's login screen and log into your account automatically.

Unlike some tweaks, this particular tip does not require you to delve into the registry or fiddle with key system files. There is a built in feature that can be used to automatically log into a particular user account, but it's pretty well hidden -- you'd be forgiven for not spotting it on your travels through the operating system.
Hit the Start button, or press the Windows key, type netplwiz and then click the entry at the top of the list of search results. If you're feeling old-school, press the Windows key and R to bring up the Run dialog and execute the same command.

In the list of usernames that's displayed, select the entry for your account (if you see more than one that appears to be yours, opt for the one that's an Administrator). Uncheck the option labelled 'Users must enter a user name and password to use this computer'.

How To Automatically Login In Windows 10
When prompted, enter your password -- for what will be the last time -- confirm it, and then click OK. That's it. Once you restart your computer, you'll be automatically logged into your chosen account. Simple

How to change user account name in Windows 8.1

When you first install Windows, it prompts you to create a user account and choose a name for it. This becomes your logon name (also called as the user name). Windows also creates a separate display name for you. If you type your full name when creating an account, Windows creates a logon name based on the first name and your full name is stored as the display name. You can easily change your display name from the User Accounts Control Panel but what about the logon name? You can change the logon name too without having to create a new user account but the way to change it isn't so obvious. Here is how to do it.


Several years ago, when Windows XP was released, it featured a new Welcome screen with avatars and a user list. It was friendlier for people who were not familiar with earlier versions of Windows, where you had to type your logon name as well as the password.

The Welcome screen still exists in modern versions of Windows. It shows a list of users with their display name, which is different from the logon name. The display name is usually the first and last name in case of an individual, but it can be anything, and can include special characters like " / \ [ ] : ; | = , + * ? < >. The logon name can't include these special characters. In Windows XP, there was an option to choose between the Welcome screen and the classic style logon. In newer Windows versions, the classic style of logon is made less prominent (it can be enabled using Group Policy).

There are several cases where you might need to view or change your logon name. For example, in an enterprise network, you need to know it to sign in to Active Directory. Depending on the devices you have and your home network setup, the logon name may be required to access various network shares or administrative resources on another PC. If you need to change it, follow these simple instructions.
  1. Run File Explorer.
  2. Right click the This PC icon in the navigation pane and select Manage from its context menu:
    manage
  3. The Computer Management window will appear on the screen. In the left pane, expand the tree nodes to go to Computer Management -> System Tools -> Local Users and Groups -> Users.
    local users and groups In the screenshot above, you can see that my actual logon name (user account name) is st, but the logon screen of Windows 8.1 shows the display name, which is 'Sergey Tkachenko'.
  4. Select the user name from the list in the right pane, right click it and choose Rename.
    rename
  5. The first column of the user list will become editable, so you can specify a new logon name:
    new login name   Press Enter. Now you can close Computer Management.
That's it. As you can see, it is very easy to change your logon name. This is an old, well known trick and is also applicable to very old versions of Windows such as Windows 2000. But ever since Windows XP, the User Accounts Control Panel only lets you change the user name. You need to use Local Users and Groups MMC snap-in or the Advanced User Accounts Control Panel (netplwiz.exe) to change the logon name.

How to Install Windows 10 on Your computer

Want to install Windows 10 on your computer? We’ve got you covered with the instructions, although it’s just like installing any other version of Windows.

UPDATE! If you want to clean install Windows 10 instead of just upgrading, you can follow our new and updated guide to clean installing Windows 10. We definitely recommend going that route.
Before you decide to upgrade your computer, you might want to decide whether or not you actually want to install Windows 10. It’s not necessarily right for everybody — there are still bugs and issues, and we really recommend that people hold off for a few weeks.
You should not install Windows 10 on your primary PC. Use a test computer or a virtual machine. If you absolutely must install Windows 10 on your regular computer, we highly recommend creating a system image of your entire computer in case you want to easily revert back.

Before You Install

Here's a couple of obvious points to consider before you head down the path of mucking about with your PC.

Windows 10 Technical Preview
First, make sure you have all your data backed up. Even if you’re careful with how and where you install the update, it’s still a good idea to have everything duplicated just in case anything goes wrong.
The update won’t be reversible, even with a recovery partition so make sure you have everything you need to re-install your original version of Windows – serial numbers, installation discs, etc.

Where to download the Windows 10 Technical Preview

Once you’re sure you have a PC that’s backed up and ready to have Windows 10 unleashed on it the next port of call is to download the upgrade.


How to Install Windows 10 on Your PCHere you’ll be signing up for the Windows Insider Program, which allows you to download and test out the software. You’ll need a Microsoft account – Hotmail, Outlook, etc – to login and you’ll need to agree to some terms and conditions along the way.
Now the next step is where you have to be a bit careful. Microsoft – for some bizarre reason – has sought to guide the user to download the upgrade version of the software, which will upgrade the very PC you’re using.
Don’t do this!

Even if you are planning to upgrade the PC you're using - i.e. it's already a spare - it still makes far more sense to download the installation separately in case something goes wrong and you have to start again. It really is a very silly way for Microsoft to have setup the preview website.
How to Install Windows 10 on Your PCInstead, head to the bottom of the upgrade page where it says “Looking for ISO files?”. Click on "Get the ISO files" and download the version that’s right for your machine. There are options for US and UK English, Chinese, and Portuguese as well as 32-bit or 64-bit versions. They're around 3-4GB so be prepared for a little bit of a wait.

How to Install the ISO

To get the Windows 10 Technical Preview onto your test PC you’ll need to either burn the ISO onto a disc or copy the files onto a USB drive.
Windows has built in burning capabilities these days so you can just use that - just insert a disc, right click on the ISO and select "Burn Disc Image". Or you can use your choice of burning software if you have something else installed - Nero or ImgBurn for instance.
For USB installs, if you have software that can read ISO files you can just copy the contents onto a USB drive or you can download and run the Windows 7 USB DVD Download Tool which will format the drive and copy the ISO to it for you.

What if I Don't Have a Spare PC or Hard Drive?

If you don't have any spare hardware on which to install Windows 10 Technical Preview but you don't want to upgrade your current Windows Install, you have a couple of options: install to a separate partition on your existing hard drive or install to a virtual machine.
To create a separate partition you'll need to resize your current partition. You can do this from the Disk Management tool - right click on My Computer and select "Manage". Just right click the disk partition you'd like to resize and select "Shrink Volume". Assuming you've got enough hard drive space you'll be able to shrink this partition and leave enough room for another Windows installation on the left over space - anything over about 10GB should be enough for a basic Windows 10 installation.
Once the original partition is shrunk click on the empty space left and select to create a new partition. Then, when you run the Windows installation make sure to select this new partition to install to.
Removing this new partition and getting back to your old installation can be a bit of a bind but that's for another article...
As for installing to a virtual machine, you can find a comprehensive guide here.

Installing the software

Once you’ve either burned your disc or copied the files to a USB drive, insert either into the PC you’d like to upgrade.
If you do have an old version of Windows - and haven’t elected to just upgrade direct from the website – you can start the installation from the desktop by just clicking setup.exe and following the instructions.
image: http://static.trustedreviews.com/94/00002e707/e825_orh616w616/10.jpg
How to Install Windows 10 on Your PCIf you don’t have a copy of Windows already on the machine you’ll need to boot from the disc or USB drive by changing the boot options in your motherboard’s BIOS.
Once booted, just follow the setup instructions. Behold a new world of "Live Tiles in the Start Menu? What's that all about?" awaits...

Get the latest build of Windows 10 Technical Preview now!

For those of you already rocking Windows 10, all you need to do is wait for the automatic update schedule to arrive and the update to the latest build with all the new fun features will happen of its own accord.
If you want to force the upgrade to happen straight away you need to go to PC Settings > Update & Recovery > Preview Builds > Check Now. You're looking for Build 9926.
The new update is essentially a fresh install so make sure any data you need is backed up. It will keep your personal files and attempt to reinstall comptible programs but it's not foolproof.

tags: computer, Windows, Windows 10,

Best free apps for iphone

best iphone apps


the 1O top and best free iPhone apps, and includes iPhone app for social networking, travel, news, photography, productivity, shoping, sport,

TeeVee 3

Storehouse

Duolingo

Periscope

whatsapp

viber

Messenger

temple run

temple run 3

temple speed


 best ios apps, best iphone apps, apps

Adobe Flash Player was blocked because it is out of date

 On Linux (Fedora 17 x86-64), Chrome keeps reporting "Adobe Flash Player was blocked because it is out of date." every time I browse a page that contains Flash. How to fix this?

did this and it turned to be working for me:
  1. Disable the libpepflashplayer in Chrome by run chrome://plugins/ in the URL bar.
  2. Install the latest flash player from adobe:
    $ rpm -qa | grep flash
    flash-plugin-11.2.202.261-release.x86_64
  3. Delete the plugins in ~/.mozilla/plugins. I am not sure whether this matters really. But after I did these 3 steps, Chrome turns to be working again.

Windows 10 upgrade icon if it's missing

1. Download the ZIP file from her
2. Extract the file from the compressed folder. You will have exacted a single file, a Windows Batch File titled win10fix_full.

3. Right-click on the file, select Run as administrator and then click the Run button to open the file.
4. With the file running, press any key to continue twice to get to the Main Menu.

win10-icon-script-main-menu.jpg
5. Press 1 and Return to run an update status check to make sure your system is up to date.
6. With your system up to date, you will have three options to add the Windows 10 upgrade icon to the system tray. In my case,